Improvements and Additions to the Kitchen in Cholula Red
A New Kitchen Faucet, A DiamondPlate Splashback, a Produce Hammock & a New Shelf
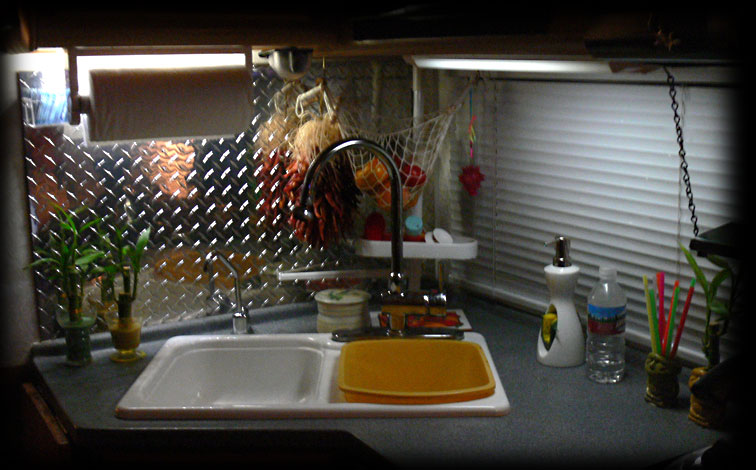
I've made a lot of little changes to the kitchen sink area. Most of these are shown in one photo at the end of this narrative.
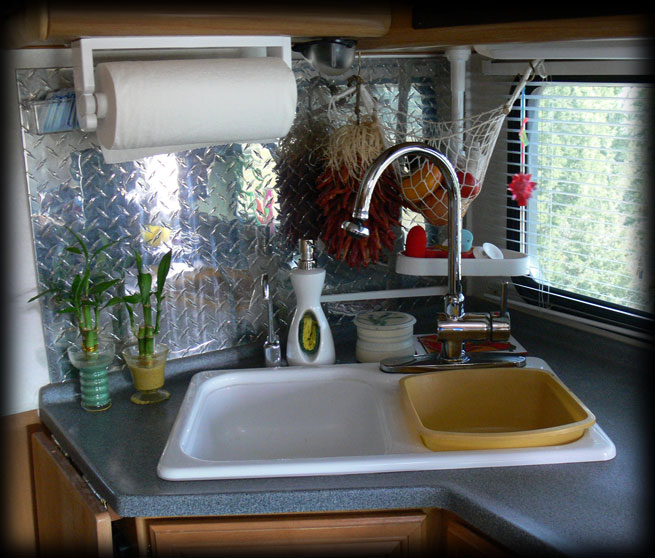
The first change was to try to add some light and cleanability to this corner. In a short amount of time, I began to notice that when washing dishes, prepping food, etc. the white textured wall had a tendency to get dirty pretty fast. I was originally looking for a piece of metal mirror (like you see in campground bathrooms) but this search quickly came to a dead end. Finally, I visited a metal fabricating plant and saw a large sheet of DiamondPlate and decided to give it a try. We have attached it with FunTak and it has ridden perfectly for over a year. I like the way it looks and it reflects a lot of light back into the room. It's also quite easy to clean.
Next, I purchased a Produce Hammock from Camping World and mounted it in the same corner. One note, this hammock comes with a wooden dowel to keep it open, but I found it made it hang too low, so I just attached the loops to hooks and now it works fine. We use it all the time. I find it doesn't have too much swing and our produce rides in it just fine.
While visiting another 30 footer, I had noticed that my friend Mariel Gertz ((the wonderful lady who puts together the Lazy Daze Balloon Fiesta group every year) had a great little shelf behind her faucet. I admired it and she was kind enough to give me an extra shelf unit she had purchased. We modified it a bit and now we have an tiny shelf that sits in the corner and gives us just a bit more real estate in that corner.
And now on to one of my very favorite improvements in the kitchen. I have never liked the pull out faucet that Lazy Daze uses in their kitchen sinks (for that matter, I'm not too fond of the kitchen sink either, but still haven't found a suitable one bowl metal sink for a replacement). I looked and looked, and finally, my friends Jake and Lisa Arguelles showed me one they had purchased at IKEA. This one fit the bill perfectly and as soon as we found an IKEA, it was the first thing I purchased. It's called the Bagvik Kitchen Faucet and I really love it. It has a single water control and a nice high goose neck so I can fit every pot and pan I own underneath it. It has also allowed us to removed the snake hose and weight that was under the sink (that allowed the old faucet head to pull out). With the addition of a rotating aerator on the head, I can reach every part of my sink for spraying. This is one of the best improvements we've made to the kitchen.
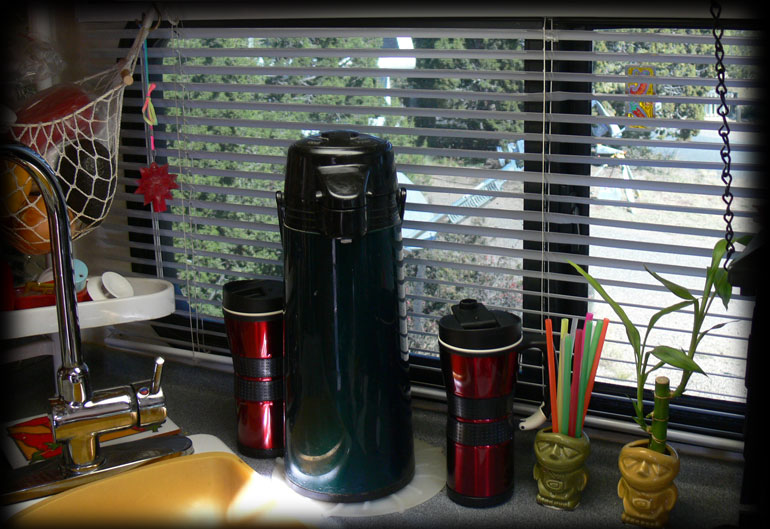
So here's a photo of my sink area as it looks today, quite an improvement, I think.
A New Counter Extension and Cutting Board
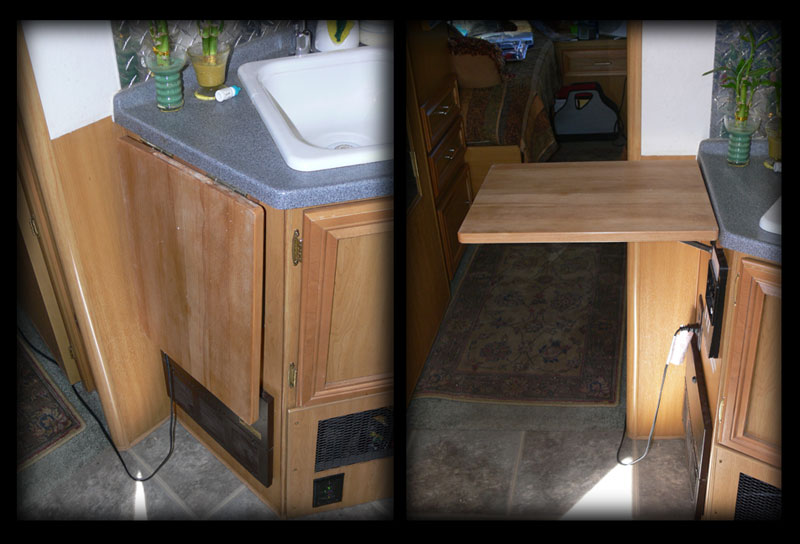
Many people complain that there is a lack of adequate counter space in smaller RVs. Lazy Daze had provided a small flip up counter extension which I felt was inadequate. My friend Andy Baird had removed his extension and replaced it with a full sized cutting board, which more than doubled the flip up area. Following his lead, we went to Home Depot and got a hard rock maple cutting board. After removing the old extension, we were able to use the same hardware and put the new one in, pretty simple. Here's a picture ofd the new cutting board both down and flipped up for use. We use this every single day.
A Place to Keep My Knives
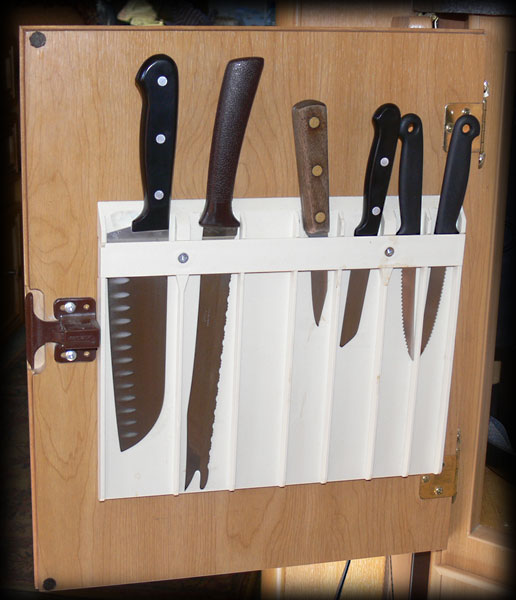
Where to put your knives is always a conundrum in an RV. We found this Knife Safe at Camping World and mounted it on the inside of the door below the sink. This means, even if they escape while we're driving, they won't rattle around the rig.
One note, all of our knives didn't fit at first, but I took a Dremel and ground down at each slot so it would fit each knife individually, and now it works fine. My knives are also really handy in this location.
Cookware Built for a Motorhome
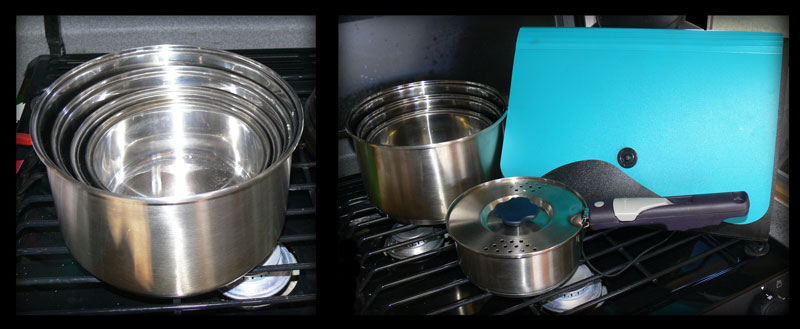
One of the things I was concerned about was which pots and pans I was going to bring in the motorhome. Going away for a week or so is one thing, but longer is a real commitment and I love to cook. I looked around at different options, and once again, Camping World came through. In looking online, I found this set. They are made by Fagor, a reputable cookware manufacturer, and the set includes five pans (four stainless steel with extra thick base plates, and a deep frying pan), four lids that can double as colanders, four plastic lids (so you can use them for storage), and two detachable handles. These all stack inside each other and use a minimum of space.
One thing I had a bit of a problem with was storing the lids. If you keep them in the pans, it becomes a bit cumbersome after a while, so I got a plastic file folder and slipped the lids and tops in this folder and now the whole set is perfect! I recommend this set highly (and if you act quickly, as of November 2006 they are on sale for only $60.00). I paid $80.00 for my set and consider it a real bargain. In addition to this set, I carry a shallow non stick frying pan and a pressure cooker and that does it for me.
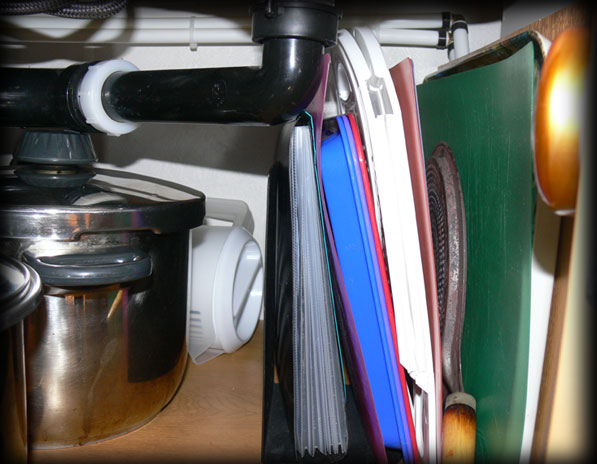
Where to Put All those Tall Flat Cooking Implements???
One problem I had was where to keep all my flat cookware? I have the file folder with my lids (mentioned in the previous description), a heat diffuser, a folding colander, several serving trays and an assortment of flat thin cutting mats. These would flop all over the place (I keep them under the sink) and they were taking up much more space than is necessary.
So what we did is to take one end of a pair of metal bookends (the kind that slip under the books and hold them up on the end) and screwed it into the floor of the cabinet under the sink. Using this on one end and the wall of the cabinet on the other, I can now keep all these pieces in a nice tight space,leaving more room under the sink for additional storage.
I have to apologize for this picture, I know it's pretty cluttered but hopefully, with the above description, you get the idea.
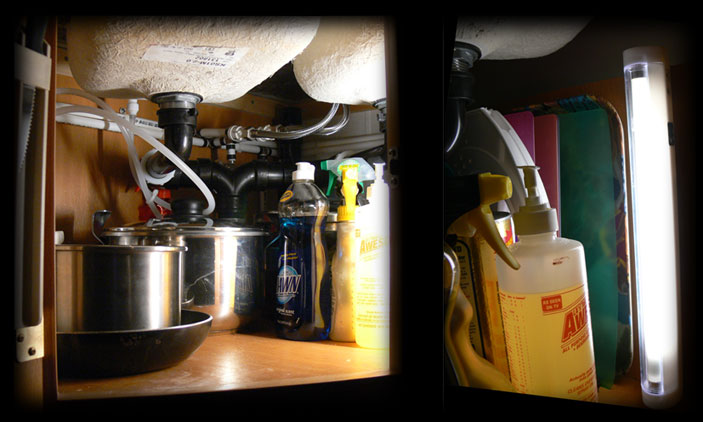
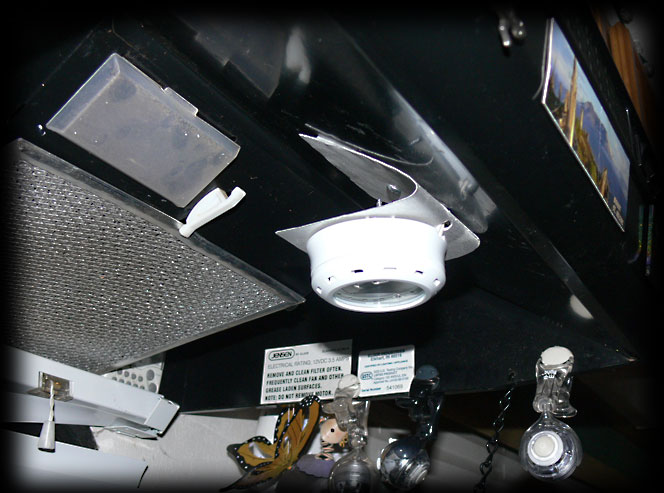
A Light Under the Kitchen Sink
While we're talking about the area under the sink, not only is that a huge area, but it's REALLY DARK. Previously, I had used a small 3 LED touch light, but it was pretty weak for that large area. Then my friend Andy told me he had an extra one tube battery operated fluorescent that he used under his sink and would I like the spare? Well, of course I said yes. While these pictures are pretty lame, those of you with Lazy Daze will see what a huge improvement this light has made. The picture on the left is the cabinet, illuminated by the one tube and the picture on the right is a shot of the tube, mounted just inside the door to the right.
Baking in the Motorhome
Baking in a motorhome oven is an oft discussed subject, and I admit it takes a bit of time to master it. The RV oven is generally pretty small and has some special requirements. For best results, I've found that you need either an air bake cookie sheet (the kind with 2 sheets of aluminum and an air pocket in between) or some kind of tiles in the bottom of the oven to disperse the heat. Personally, I prefer an air bake cookie sheet, but the correct size may be a bit difficult to find. I have also found, at least in my oven, that I need to boost the heat by about 50 degrees, but this is something you need to check in your particular oven.
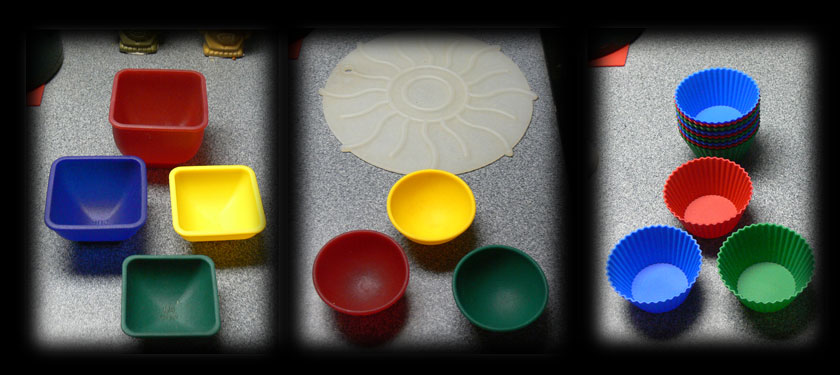
One other thing I have found most helpful in the rig is silicone bake ware. I just love this stuff! My main set is from Costco, a seven piece set, consisting of two six hole muffin pans, two loaf pans, two cake pans and one nine inch square cake pan, all for just $27.00! Since I've been using the Costco set, I've found other pieces and use these every day for different things in the kitchen. Below are pictures of my measuring cups, a set of pinch pots (great for sauces, to use as tea bag holders, etc.) and I just recently found cupcake liners made of silicone. One other thing that's really nice about silicone is that it weighs next to nothing and you can roll it up and shove it into places that have rattles. I also like the colors, it's quite cheerful!
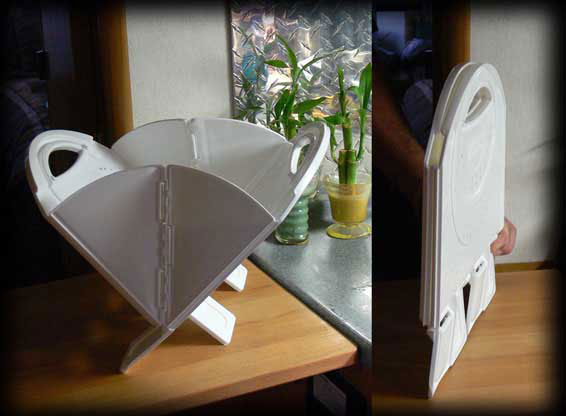
Finally, a Colander That Collapses
I find that I need a full size strainer in the motorhome, and up until a short time ago, I traveled with a regular colander. My friend Jonna and I had looked at the collapsible silicone colanders but, really, they just didn't save that much space. Then I found this collapsible colander at Bed, Bath and Beyond for $10.00. When collapsed, it takes up hardly any space at all, yet when expanded, it holds five pounds of potatoes! This is a perfect solution for any motorhome (and it fits right in my sink).
Heating Water
We often dry camp and making our water stretch as far as possible is a major goal. One way we've found to help with conserving water is to use a pump pot. In the morning, we heat a full kettle of water and put it in the pump pot. That way, it's available all day long for additional coffee (we use a Melittta one cup drip) or tea. If at the end of the day, we still have water, we use it for washing dishes and if there's any more left, we use it for flushing.
Tiny Dots on Microwave,
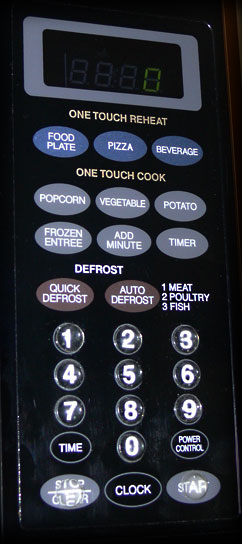
Our microwave has a flat touch panel which I have some problems with. To give it a more tactile feel, I've used 3M clear dots, meant for placing under items so they won't scratch furniture. I put them on the numbers of the panel and on the start and stop buttons. I've found this makes the microwave much easier to use, and the dots also very slightly magnify the numbers.
After putting them on the microwave, I also attached them to the face of my Link 10 Battery Monitor, since it's located high in the rig. The dots make it much easier to reach the buttons. I also attached one of the dots to the green light that signals that the inverter over our TV is on. The magnification really helps and I've found I have much less tendency to accidentally leave the inverter on.
Storage Under the Stove
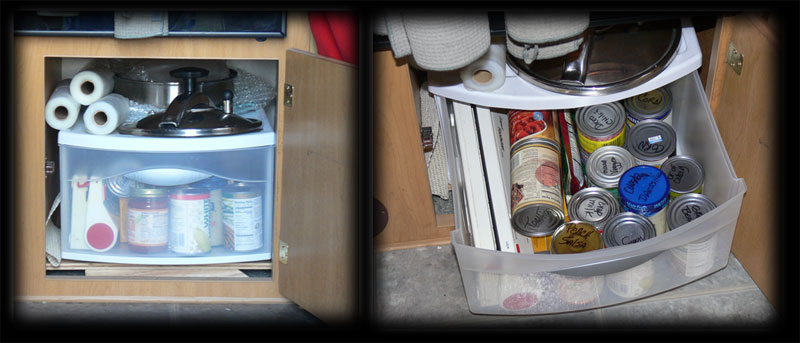
Always looking for more storage, I was a bit upset about the cabinet under the stove. Not only was it flat on the floor, but it was REALLY deep,. The combination made it pretty useless for day to day use. Finally, we found a plastic drawer unit that was as deep as the compartment. The only problem was that the floor of the cabinet is below the lip of the opening. To remedy this, we installed a false floor in the compartment which raised the new drawer unit high enough to make it usable. Now we have a nice deep drawer and some extra storage.
You might also notice that we've learned to write the contents on the top of our cans with a Sharpie Marker. This saves a lot of time as we don't have to lift out every can to find what we want.
Paper Plate Holder
The cabinet over our stove has a short shelf in the back, which makes for a lot of unused space in the middle of the cabinet. If you put tall items on the bottom, they block this shelf, so something else is called for to utilize this space, We took this idea from out friend Jonna Harlan, who had installed a Pop-A-Plate on back of the door of this cabinet. Now our paper plates are readily available and space that would otherwise be wasted is put to good use.

Drawer Inserts
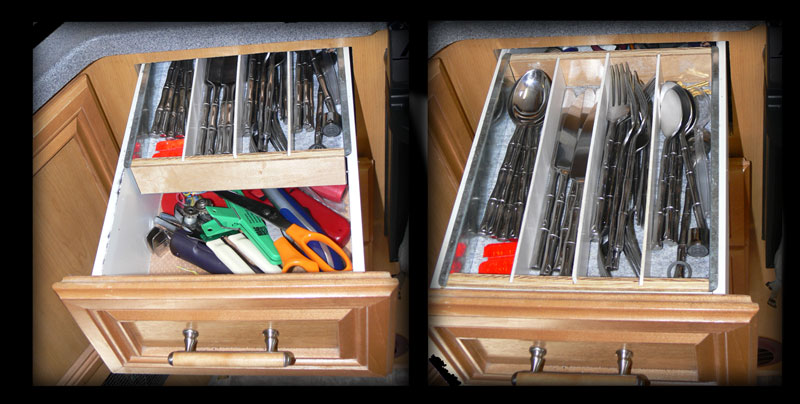
One of the drawbacks of the kitchen drawers in a Lazy Daze is that they are very deep. If you put a regular silverware divider in the drawer, you end up with several inches of wasted space.
Fortunately, another Lazy Daze owner has come to the rescue. A gentleman named Paul Grinde manufactures these inserts that just fit in the drawer, giving you two layers. The way they are constructed, they slide back and forth, so your drawer space is truly doubled. Paul makes these for every model Lazy Daze and donates the proceeds to his Elks Lodge, so everyone wins! Another great idea from a fellow Lazy Daze owner.
Stove Cover as Shelf
Almost every motorhome owner deals with the stove cover in a different way. Many simply remove it and use a special wood cutting board that fits over the stove top, removing the wood as necessary for cooking. This idea didn't really appeal to me, but once again, my friend Andy Baird came up with the right idea. By drilling two small holes in the side of the stove cover and another pair of holes in the stove hood, you then simply attach a length of chain and Voila! You have a great baking shelf. We usually drop this for traveling, but it really isn't necessary and I like the little bit of extra cooking space it provides.
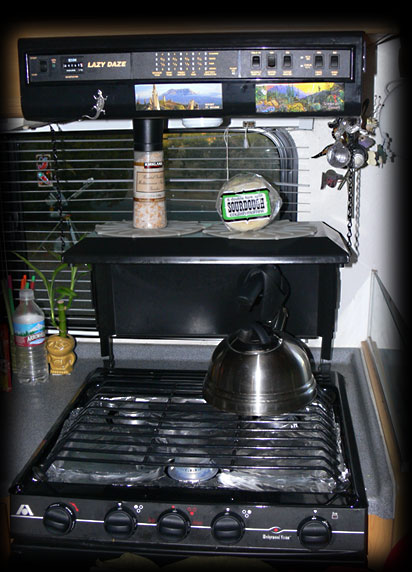
New Light for the Stove Cooking Surface
The light that originally came in the stove hood was pretty dim and I found it totally inadequate for cooking. Once again, Andy to the rescue! He had this spare 20w halogen fixture, exactly like one he had installed in Skylark. Of course, I wanted one that pointed straight down on that front burner (Andy had mounted his at an angle so it points slightly back). Terry and Andy put their heads together and came up with the perfect solution. They fabricated an aluminum wedge (created from a piece of metal they found abandoned at our campsite) and attached it to the hood, with the light attached to the bottom. This little light is wired right into the stove panel so it turns on with the same switch as the old dim light, but what an improvement!
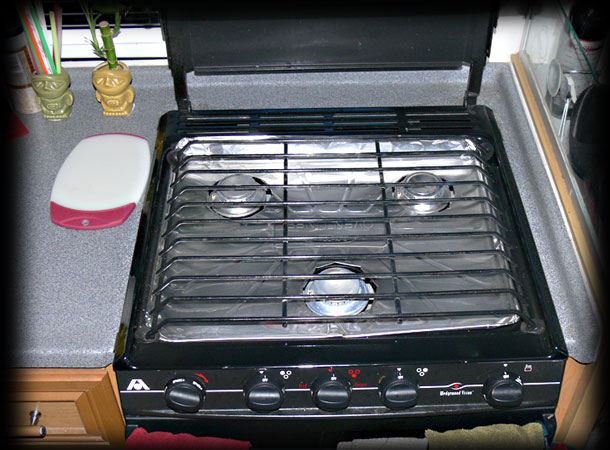
That Danged Black Stovetop . . .
One of the minor annoyances in Cholula is her black stovetop. This material shows every speck of dust, every grease splatter, and just anything that sits on it. And if you don't clean it perfectly every time, it tends to get a film. Since I cook two to three times a day,this soon became a major annoyance. I look at Andy's upgraded white stove and am envious of it's beauty, but I'm just too cheap to replace a stove that works fine (and I'm saving for Top Down/Bottom Up shades, my next major improvement).
My first attempt at improvement was to line the surface with tin foil (as seen in the picture showing the folding shelf above the stove). While this worked ok, it was a real pain to do and hard to clean.
So there I was in the Dollar Store when I saw a set of heavy foil oven liners. Hmmm thought I, could the planets actually align so that this would fit my stove top? Well the price was right so I got them, and are they ever slick! It did take a bit of time to get the burner holes right, but I'm really happy with the results. I found the easiest way to do the holes was to place the liner on the stove and mark the center of the burner. Then punch a hole in the center and work out with a sort of star pattern, folding the foil under till the fit is to your liking.
I had originally thought to have to replace this every couple of weeks; however I'm happy to say that after a month, I'm still using the original liner and expect it to last quite a while. Best of all, it cleans up to like new in just a couple of seconds. Here's a photo so you can see what it looks like.
Small LEDs in Kitchen
By now you may have figured out that I'm a bit of a light freak. While I really appreciate all the fluorescent lights that Lazy Daze installed in Cholula, I find them a bit too much, so we've added lots of different options.
While shopping at an IKEA (truly one of my favorite stores!), I found a set of four strips of 12 extra bright LED lights. These are called Trettioen and while I wasn't sure what I'd do with them, I knew I'd find a use for them in the motorhome.
So far, we have installed two of these strips. One is mounted right behind the paper towel holder and another is mounted inside of the lens of the fluorescent located over the sink area. We wired them through the cabinets and inserted an additional switch on the end of the fluorescent which controls both strips. These give a wonderful soft light at night and I love the light they bounce off of the DiamondPlate. So far, I haven't decided to do with the other two, but I'm certainly pleased with their effect in the kitchen.
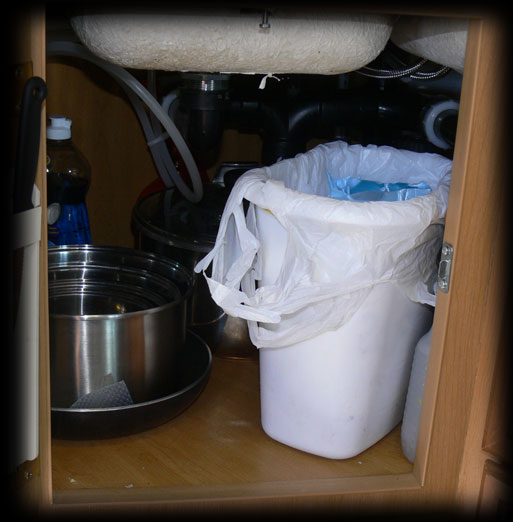
Garbage Can
While I'm not sure if this is of a lot of interest to most people, trash and what to do with it seems to be a constant discussion among RVers. With that in mind, I thought I'd show you what we do with our kitchen trash. We have purchased a small trash can that just holds a normal sized plastic grocery bag. These bags are readily available and while they're pretty small, it keeps the garbage in the rig to a minimum. The can is small enough that I can just lift it out of the cabinet and use it for wet trash or when I'm dealing with vegetables or fruit.
This page is an ongoing project. I hope you enjoy it and if you have any ideas to share, feel free to email me!
![]() This Website was created on a Mac by Kate Klein
This Website was created on a Mac by Kate Klein